
귀퉁이 서재
컴퓨터 비전 - 2. HOG 얼굴 검출 (HOG Face Detection) 본문

이전 게시글에서는 하르 캐스케이드를 활용해 얼굴을 검출하는 방법을 알아봤습니다. 초기 객체 검출 모델이라서 성능이 썩 좋지는 않았습니다. 이번에는 HOG 검출기를 활용해 얼굴을 검출해보겠습니다. 일반적으로 HOG 검출기가 캐스케이드 검출기보다 성능이 좋습니다. HOG 개념에 관해서는 OpenCV - 33. HOG(Histogram of Oriented Gradient) 디스크립터를 참고해주세요. 이론을 설명해놨습니다. 이 게시글에서는 이론은 제외하고 바로 코드로 구현해보겠습니다.
아래 코드는 구글 코랩(colab)을 바탕으로 설명합니다.
1. 구글 드라이브 마운트 & 이미지 불러오기
이번에도 구글 드라이브를 마운트합니다. 구글 드라이브 안에 있는 이미지 데이터를 불러오기 위해서입니다.
from google.colab import drive
drive.mount('/content/drive')
다음으로 사람 이미지를 불러와서 크기를 줄입니다.
import cv2

# image source : https://unsplash.com/ko/%EC%82%AC%EC%A7%84/hOF1bWoet_Q
image = cv2.imread('/content/drive/MyDrive/colab/Computer-Vision-Course/Data/Images/people.jpg')

image_resized = cv2.resize(image, (755, 500))
사람 이미지를 출력해볼까요?
from google.colab.patches import cv2_imshow

cv2_imshow(image_resized)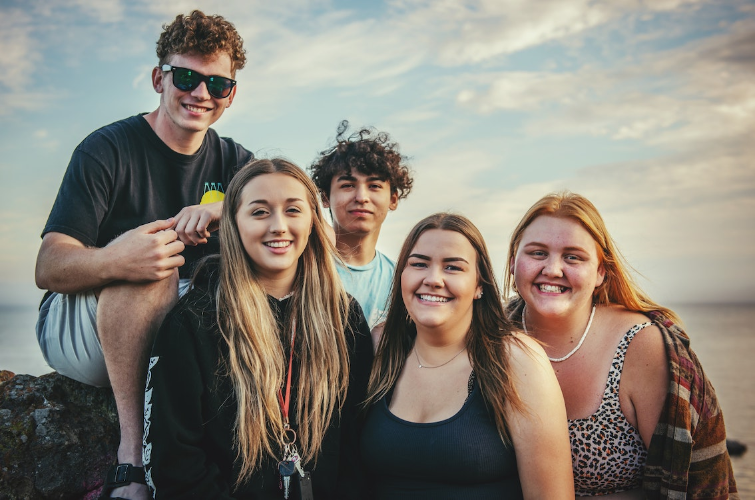
2. HOG 검출기로 얼굴 검출하기
이미지를 불러왔으니 HOG 검출기로 얼굴을 검출해보겠습니다. HOG 검출기는 get_frontal_face_detector()로 불러올 수 있습니다. get_frontal_face_detector()는 아무 파라미터도 받지 않습니다. get_frontal_face_detector()만 호출해도 사전 훈련된 HOG 검출기를 불러옵니다. 이를 활용해 얼굴을 검출해보죠.
import dlib

hog_face_detector = dlib.get_frontal_face_detector()

face_detections = hog_face_detector(image_resized, 1)
hog_face_detector()의 두 번째 파라미터는 스케일 조정 파라미터입니다. 캐스케이드 검출기의 scaleFactor와 비슷하다고 보면 됩니다. 값이 클수록 더 경계 박스를 반환합니다. 곧, 값이 클수록 검출하는 얼굴이 적다는 이야기죠.
검출 결과를 보기위해 face_detections를 출력해보죠. 아래와 같이 출력됩니다.
rectangles[[(237, 188) (312, 262)], [(519, 237) (594, 312)], [(328, 170) (391, 232)], [(395, 246) (469, 320)]]
사각형 좌표가 총 네 쌍이 출력됐습니다. 한 쌍 안에서 값의 의미는 순서대로 검출한 경계 박스의 [(좌상단 x좌표, 좌상단 y좌표) (우하단 x좌표, 우하단 y좌표)]입니다. 이 경계 박스 좌표를 활용해 이미지에 경계 박스를 그려봅시다.
for face_detection in face_detections:
    left, top, right, bottom = face_detection.left(), face_detection.top(), face_detection.right(), face_detection.bottom()
    cv2.rectangle(image_resized, (left, top), (right, bottom), (0, 255, 0), 2)

cv2_imshow(image_resized)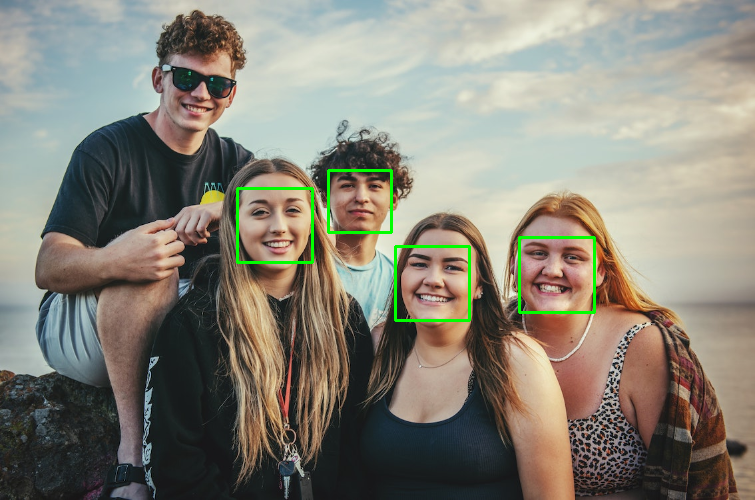
선글라스를 쓴 사람의 얼굴은 검출하지 못했네요. 나머지 네 명은 잘 검출했습니다.
3. CNN을 활용한 얼굴 검출
이번에는 CNN을 활용해 얼굴을 검출해보겠습니다. CNN을 활용하며 HOG에 비해 성능이 더 좋습니다. dlib의 cnn_face_detection_model_v1() 메서드로 CNN을 활용한 검출기를 불러올 수 있습니다. 이때 파라미터로 'mmod_human_face_detector.dat' 파일을 전달해야 합니다.
cnn_face_detector = dlib.cnn_face_detection_model_v1('/content/drive/MyDrive/colab/Computer-Vision-Course/Data/Weights/mmod_human_face_detector.dat')CNN 검출기로 얼굴을 검출해볼까요?
# Reload the resized image since the bounding-box is already drawn in the resized image.
image_resized = cv2.resize(image, (755, 500))

# The second parameter is also a scale related parameter.
face_detections = cnn_face_detector(image_resized, 1)

# c is the confidence indicating the reliability of a single detection.
for idx, face_detection in enumerate(face_detections):
    left, top, right, bottom, confidence = face_detection.rect.left(), face_detection.rect.top(), face_detection.rect.right(), face_detection.rect.bottom(), face_detection.confidence
    print(f'confidence{idx+1}: {confidence}')  # print confidence of the detection
    cv2.rectangle(image_resized, (left, top), (right, bottom), (0, 255, 0), 2)

cv2_imshow(image_resized)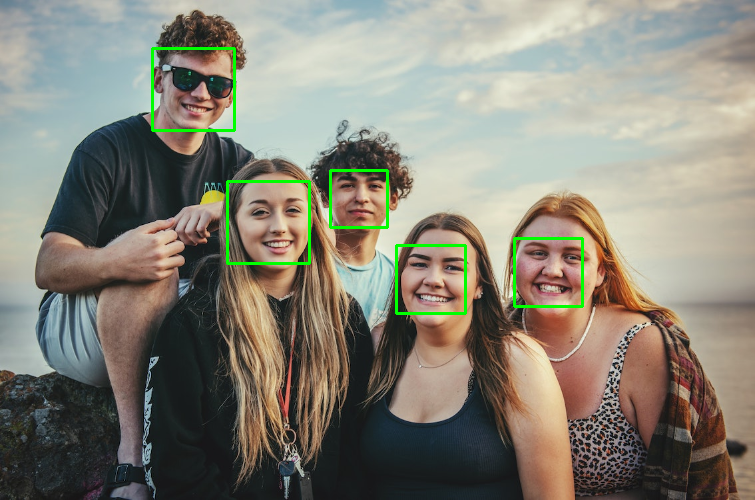
정확히 다 검출했네요. 역시 CNN을 활용하니 HOG에 비해 성능이 더 좋습니다.
다른 이미지로도 테스트해보겠습니다.
image2 = cv2.imread('/content/drive/MyDrive/colab/Computer-Vision-Course/Data/Images/people2.jpg')

image2_resized = cv2.resize(image2, (700, 500))

face_detections = cnn_face_detector(image2_resized, 1)

for idx, face_detection in enumerate(face_detections):
    left, top, right, bottom, confidence = face_detection.rect.left(), face_detection.rect.top(), face_detection.rect.right(), face_detection.rect.bottom(), face_detection.confidence
    print(f'confidence{idx+1}: {confidence}')
    cv2.rectangle(image2_resized, (left, top), (right, bottom), (0, 255, 0), 2)

cv2_imshow(image2_resized)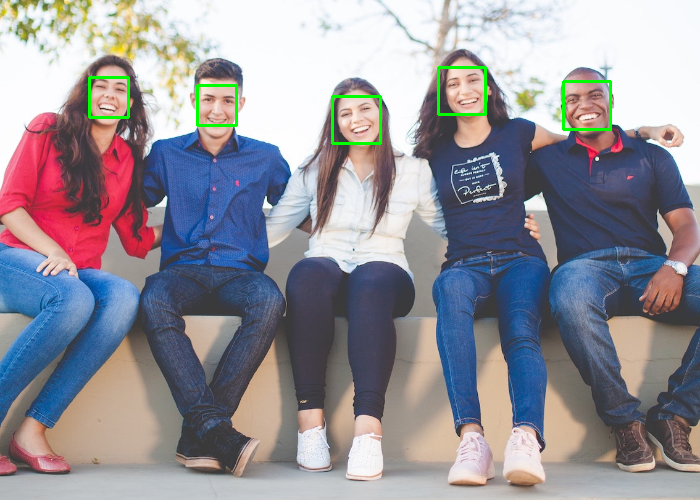
역시나 정확하게 검출했습니다.
참고 자료
'컴퓨터 비전' 카테고리의 다른 글
| 컴퓨터 비전 - 6. 영상에서 감정 분류하기 (2) | 2023.03.10 |
|---|---|
| 컴퓨터 비전 - 5. 얼굴 이미지에서 감정 분류(Emotion Classification) (0) | 2023.03.09 |
| 컴퓨터 비전 - 4. LBPH 알고리즘을 활용한 얼굴 인식 (0) | 2023.03.09 |
| 컴퓨터 비전 - 3. LBPH(Local Binary Patterns Histograms) 알고리즘 (0) | 2023.03.07 |
| 컴퓨터 비전 - 1. 하르 캐스케이드 얼굴 검출 (Haar Cascade Face Detection) (0) | 2023.03.03 |


